Hello everybody, it is John, welcome to our recipe page. Today, we’re going to prepare a distinctive dish, how to brush-clean and freeze enoki mushrooms. One of my favorites. This time, I will make it a little bit unique. This will be really delicious.
Note that sometimes washing mushrooms can make them soggy and lead to freezer burn. Some people prefer to simply brush or wipe them off prior to sticking them in the freezer. A demonstration of how to clean Enoki Mushrooms before cooking!
How to Brush-Clean and Freeze Enoki Mushrooms is one of the most favored of recent trending foods in the world. It is enjoyed by millions every day. It is simple, it is fast, it tastes yummy. They’re nice and they look wonderful. How to Brush-Clean and Freeze Enoki Mushrooms is something that I’ve loved my entire life.
To get started with this particular recipe, we have to prepare a few ingredients. You can cook how to brush-clean and freeze enoki mushrooms using 3 ingredients and 11 steps. Here is how you cook that.
The ingredients needed to make How to Brush-Clean and Freeze Enoki Mushrooms:
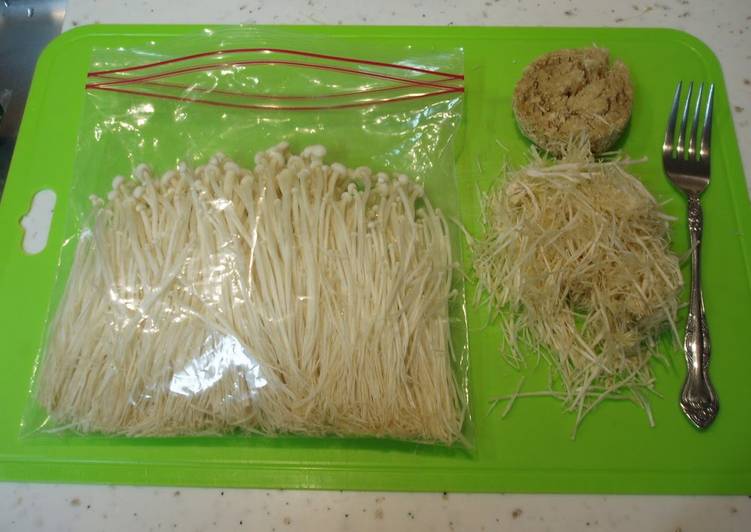
- Prepare 1 packet Enoki mushrooms
- Get 1 Fork
- Make ready 1 Ziplock freezer bag (or any freezer bag you can seal tightly)
When selecting Enoki mushrooms, inspect the cluster thoroughly. Enoki mushroom is a type of mushroom that is very popular in Asian cuisine and is a popular ingredient for sushi rolls. Comparatively it tastes very sweet and looks clean unlike other mushrooms. And fresh enoki mushrooms shouldn't be slimy in its stem or with its caps discolored.
Steps to make How to Brush-Clean and Freeze Enoki Mushrooms:
- I processed 200 g today.
- Cut off just the very end of the roots. Shred the enoki mushrooms a little so that they lie flat.
- Divide into six clumps. Hold the middle of a clump securely with your left hand. Use a fork with sharp tines.
- With the mushrooms held down, stick the fork into the stems about 3 cm from the root end, and brush through the stems towards the root ends. You can see the removed dirt on the right top.
- Before and after. On the left are mushrooms that have just been shredded apart. On the right, mushrooms that have been cleaned as described above. There are no gritty bits, and the tough chewy parts of the root ends are removed, too.
- When each mushroom has been shredded apart, line them up neatly in a ziplock bag and freezer. You can wrap them first in plastic wrap if you prefer. Here are 2 packs worth.
- These are the leftover parts: the root ends, and the tough and hard to eat bits.
- By brushing through the stems with a fork, even the stem ends are nice and separate. Use in soups, chopped up in ankake dishes (with thick sauce), or use as-is. Blanch before using in cold dishes.
- Here are some brown (mountain) enoki mushrooms.
- If you want to make 'bacon wraps', since the mushrooms are already separted and there's no need to cut them, it's easy to make when you need one more item in a bento.
- Or, you could make the bacon rolls and freeze them. Just pan fry them from frozen. It saves so much time in the morning.
Enoki mushrooms exemplify the power of restraint. Like wispy, mildly sweet threads of pure umami, enoki mushrooms exemplify the power of restraint. These light, thin mushrooms don't hold up well to heat, at least not for more than a minute or two, but that doesn't mean you can't work around their. Learn how to freeze fresh herbs and aromatics like cilantro, ginger, etc. to reduce waste and make sure you always have what you need to make any recipe! For enoki mushrooms, you can trim the bottoms off and then brush any remaining dirt off with a clean kitchen brush or textured kitchen towel.
So that is going to wrap this up with this exceptional food how to brush-clean and freeze enoki mushrooms recipe. Thank you very much for reading. I am confident you can make this at home. There is gonna be more interesting food in home recipes coming up. Remember to save this page in your browser, and share it to your family, colleague and friends. Thank you for reading. Go on get cooking!